Tuesday, December 13, 2011

Decorating a Contact Paper Christmas Tree

I've had this idea in my head for a couple weeks now, but knew it would be a lot of work to put it together. The other day I finally took a couple hours to get going on it. I'm so glad it's done and being enjoyed!
Using green construction paper, I made a big Christmas tree, taping it into three sections. I then traced each section onto contact paper and cut it out. After taping the tree to the wall, I taped the contact paper over it, sticky side out. 

I then cut paper ornaments. I drew patterns and cut out bells, candles, bows, ornaments, stars, candy canes and gingerbread men. Whew!

We've done contact paper art work in the past, so Ty knew just what to do. He seemed excited to decorate his tree!

Putting a star on top. He also dumped all of the paper ornaments onto the floor, which I figured he would! I didn't go crazy trying to find a container with a place for each ornament because of that.

The next day he took off the star he had on top and replaced it with a gingerbread man. Sometimes you can pull the paper off without it ripping, which is nice.

His tree so far! He really tried to bunch as many ornaments into one section as he could!

Sunday, December 11, 2011

Large Motor Shapes & Colors Game

This game combines pre-academics with gross motor activity, which actually makes the brain more ready and able to learn!

To create the game, I simply cut shapes from colored construction paper, wrote the name of the shape on each one (you could also write the color, depending on what area your child is working on), and used packing tape to affix them to the floor.
To play, get excited and simply ask your child to jump on (or walk to, stomp on...whatever they like) each piece. I would ask Ty if he could "jump on the red square!" for example as he knows his colors and is pretty good with shapes.

Tip: If you're working on colors only, I would make them all the same shape. If your focus is only shapes, I would make them all the same color. This will let them focus on the area they need to without distractions.

 He enjoyed calling out the colors when he jumped to each. The names of shapes are trickier words for him.

We then used our homemade bean bags to throw onto each shape. This was a bit tricky and we had better luck getting a bit closer to each shape, but Ty still enjoyed it. You could also simply ask your child to put a bean bag on particular piece. If you have colored bean bags it may be fun to match them up!

A bit later he decided to use his scooter board to aim for each shape, again calling out colors as he ran them over.

Day two of having these shapes on our floor and he can't help but use the shapes like a hopscotch board and hop from shape to shape as he passes from one side of the room to the other!

Linking-up with 1+1+1=1

Friday, December 9, 2011

Foil Painting

Painting on foil is an easy but special way to create for children. The glow and shine of the foil is so lovely, and the smoothness of paintbrushes and little fingers over it is just delightful! It's a rich sensory and artistic activity that creates some pretty neat results, especially when wrapped over cardboard and hung for all to see.


 I gave Tyler different sized brushes as well as Q-tips to use. He generally uses painting tools for a while, then goes to using his hands.

Hand prints have been a Tyler favorite lately
 
Big circles have been showing up a lot as well

Easy to "erase" your pictures on foil! 

More hand prints, though these were with great force, more like splatter hands

When he was finished, I asked if he wanted to add glitter. Of course he did!

He asked to do more after this so I gave him another piece of foil. He was especially impressed with his curly shape here.

Ooooh!

For fun I just had to show you his beautiful bath water from the soak he had after painting!

The finished product would have been more finished if I had backed it with the cardboard before he painted, but I forgot. I also forgot that adding a teaspoon of dish soap to the tempra will help it adhere to the foil better. Oops. It still makes a lovely addition to the art work in our home for now! We'll see how much it peels... I'm sure Ty would love to repeat the activity really soon!

Thursday, December 8, 2011

More Magnetix Play

Sometimes I get a little idea...which grows into a kind of bigger, crazy idea. Sometimes it all works beautifully, sometimes not, but usually something good comes out of it. This was one of those times!

Last Christmas I received a set of Christmas themed cookie cutters. Really cute and with big and small cutters for each shape. The other day I suddenly remembered that I even owned these, and thought they may be fun for Tyler to match-up. I found them right away and looked through the box with an excited Ty. We labeled each shape, I showed him how there were small and big for each and casually demonstrated matching and nesting the matches inside of each other. I then thought that I could make it all more exciting by tracing the shapes onto paper so that he could match them that way. I also wanted him to be able to hang them somehow. I couldn't say why, I just did. Nails in the wall? Yeah, probably not a good idea. Looking around I noticed his Magnetix magnets and the long rods within the set. He could hang them from those perhaps? On a cookie sheet? No, no, no...refrigerator! By this time it was time for nap and off Tyler went with my husband. I tested out my plan. It worked! I mean, Ty would have to be careful so as not to knock the rods off of the fridge, but part of Montessori is learning to be careful, right? I got busy, knowing this could look really cool. In my head I knew it may really not work, but I couldn't help wanting to see the finished project.


After a good twenty minutes of tracing, writing, placing and centering the paper, finding my old locker keeper from 17 years ago and engineering a way to keep it on the fridge to hold the cookie cutters, it was finished. I beamed. Beautiful!

 When Ty woke we did his balloon rocket activity I posted about earlier, then I showed him the work. He was pretty excited...until he tried to really do it. The magnets on the end of the rods kept catching on the cookie cutters, a problem that I didn't have. I tried to stick putty over the ends to avoid the issue but as I tried to fix it, another problem quickly popped up. He was trying to be careful, but the rods were easily knocked down and off of the fridge. Ty stuck with it for quite a while, though I secretly wished that he would quit. I kept trying to help and make it work for him, rescuing and replacing rods, but I knew it was a fail. When he stopped, I promptly removed the papers and arranged them on the floor and demonstrated how to match them there we were trying to do on the fridge.. Ehh, not interested. The moment had passed and he moved on to something else. Blech. It didn't feel good.

 A while later he came back to the fridge and began randomly playing with the magnets. I wanted to give him something purposeful to do with them if he pleased. I quickly traced a circle onto paper and taped it to the fridge, showing him how he could place the rods onto the line of the circle to, well, make a circle.

He wasn't especially into what I demonstrated, but he really liked the circle, putting the rods mostly inside of the circle and counting them each as he placed them. Well that's not so bad, huh?!

Later I decided to draw dots inside the circle to form a happy face and showed him how to place a rod on each dot to make the face. He thought this was pretty cool, but didn't seem to grasp the concept. Just before bed though, he surprised me by heading to the fridge and doing it...and he did it well!

Tyler's Magnetix smiley face

The next morning he fiddled around with the magnets and discovered a few different ways that he could play with them on the fridge!  

Though I don't have a photo of any of his creations (this is clearly my "art" above), Ty also learned through experimenting that you can lay the Magnetix flat on the fridge, and that if the poles push away from each other, one rod will literally race straight off of the fridge! Pretty neat.

I love how many creative ways we can use these magnets and am so glad that I followed through on a bit of a flaky idea. We never would have discovered a new, exciting way to spice up our Magnetix use otherwise!

For a look at how I introduced Tyler to these Magnetix at 20 mos, and how we had been using them since then, you can take a look at this old post. Please remember that magnets can be dangerous if swallowed so know your child and always supervise magnet activities with young children!

Tuesday, December 6, 2011

Balloon Rocket

In looking for more science ideas for Tyler, I found something that not only tickled his natural scientist, but his balloon adoration as well! I just love when  two different areas of interest come together in one activity!

Materials needed:
A least one balloon
Straw
String/fishing line
Tape

To make your rocket:
String the straw through whatever kind of line you're using, making sure the straw can move easily. 
Secure each end of your line to something (trees, chairs...whatever you can).
Get a piece or two of tape ready. 
Blow up your balloon and pinch the end shut. 
Tape it to the straw.
When you're ready, let go of the balloon and watch it zoom down your line!

 It was quite difficult to take pictures of this in action, but here you can see the balloon whizzing past an amazed Ty!

We did this over and over for half an hour per Tyler's request, using a few different balloons as they wore out from time to time. Tyler's job was so push the string back and to bring the balloon back as it often fell off at the end.

Near the end, Tyler asked to do two balloons at once. Wow. It's a bit tricky enough to do this with one balloon, but two?! I thought I'd need four hands but I actually succeeded in the double balloon rocket three times (Mommies can do anything!). It was neat to see the rocket zoom with double the thrust! I don't think he knew it would do this, but we did talk simply about how the air coming out of the balloon was pushing it down the line.

I also tried to blow up the balloon to different levels so we could observe how far it would go based on how much or little air was in it, but Ty wasn't having it. He wanted the balloon to go at full force! He was also tired and kinda on the edge of meltdown (this is a common theme lately around here unfortunately) so I didn't push it. There's time to try that another day. In the future I'd like to also put the line at different inclines and use different shaped balloons!

I knew Tyler would want to watch the balloon in action later when it was taken down, so I took video. I figured since it's difficult to see what's going on from pictures I'd share it here too. Enjoy!

Monday, December 5, 2011

Rainy Day Jumping Pit


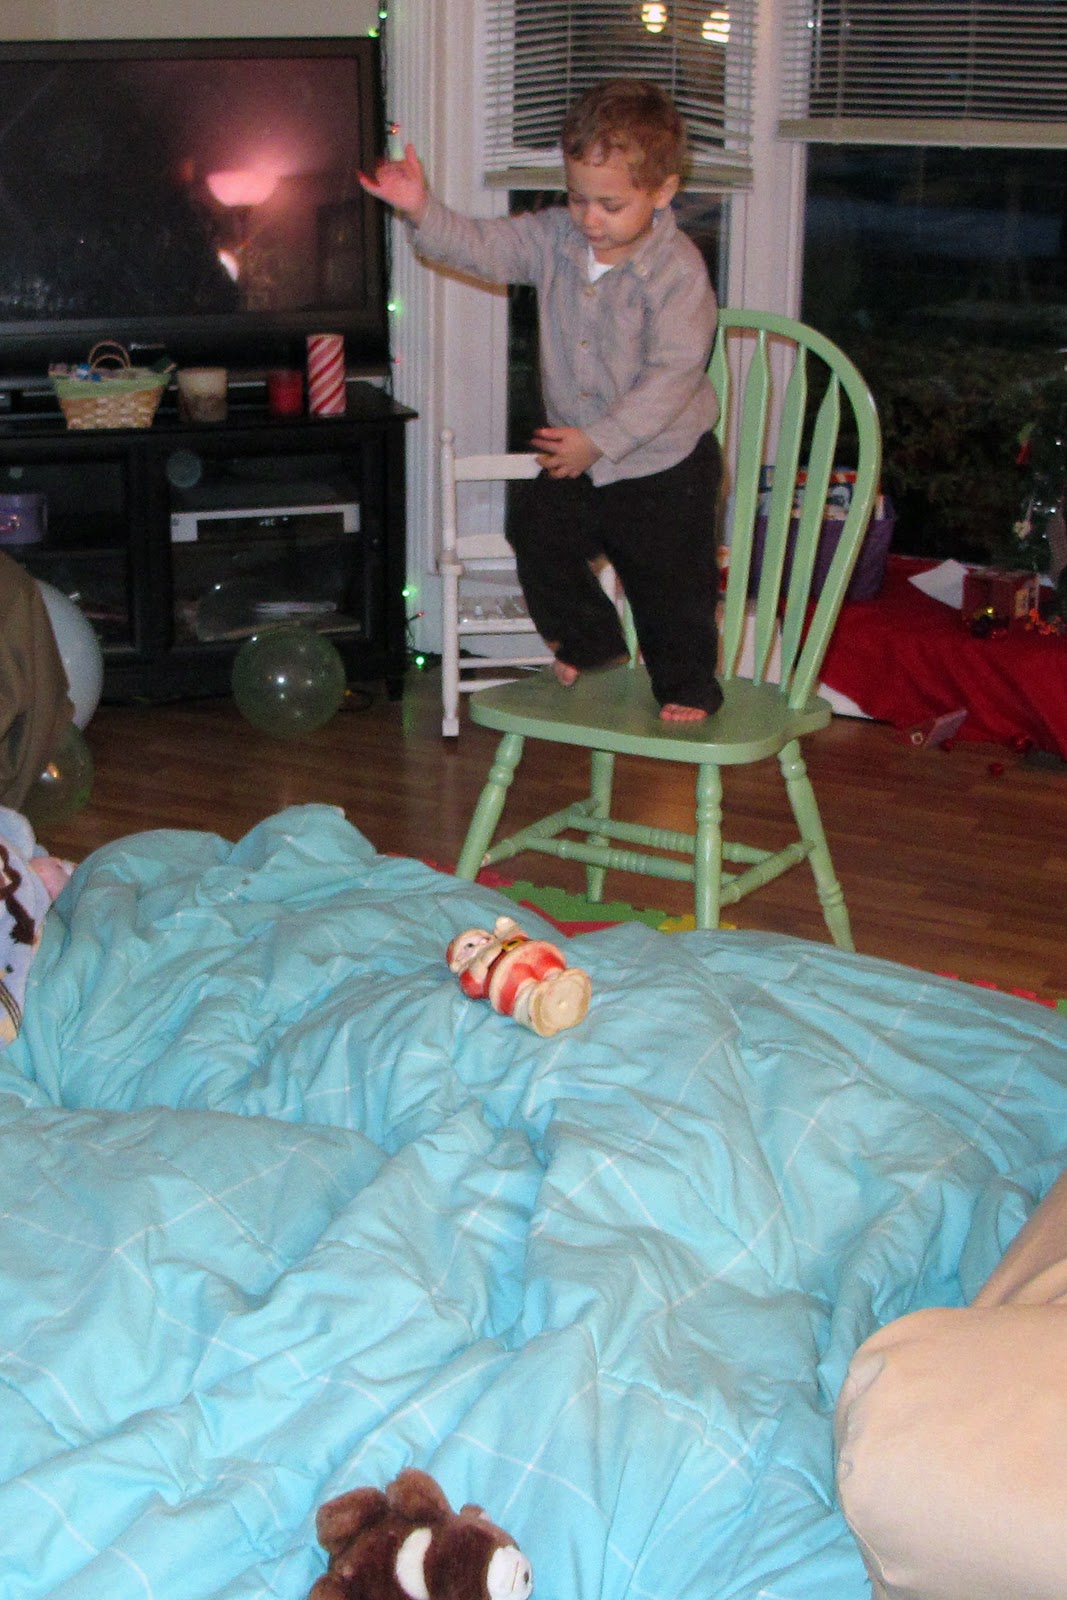
Tyler has been such a little kangaroo lately! He can't stop jumping, and jumping off of things has been a favorite past-time for a while, so we made him this pit to jump into to get his energy out the other day when we couldn't get outdoors. We used the couch cushions and every blanket and pillow in the house to make it, then put his cushy alphabet mats on both sides of it in case he somehow fell off. We pushed the couch/ottoman and chair up against it on both sides for jumping off and away he went!

We brought out stuffed animals after a while, but this old squishy/squeaky Santa (which was mine as a kid) was all he really wanted. He loved setting it up then aiming for it as he jumped, making it squeak as he landed on it.

I realized that he really wanted more height, so I pulled up a chair for him. I think he would have been much happier if we turned the living room chair around so he could jump off of the back of it, but I didn't think of it until it was too late. Next time!

While my husband and I jumped in too from time to time, after a while he wanted us to jump alongside him. Fun!